Electrical Products & Services
Practical guidance to choose, install and maintain LED lighting retrofits for energy savings, cold-weather performance and code compliance.
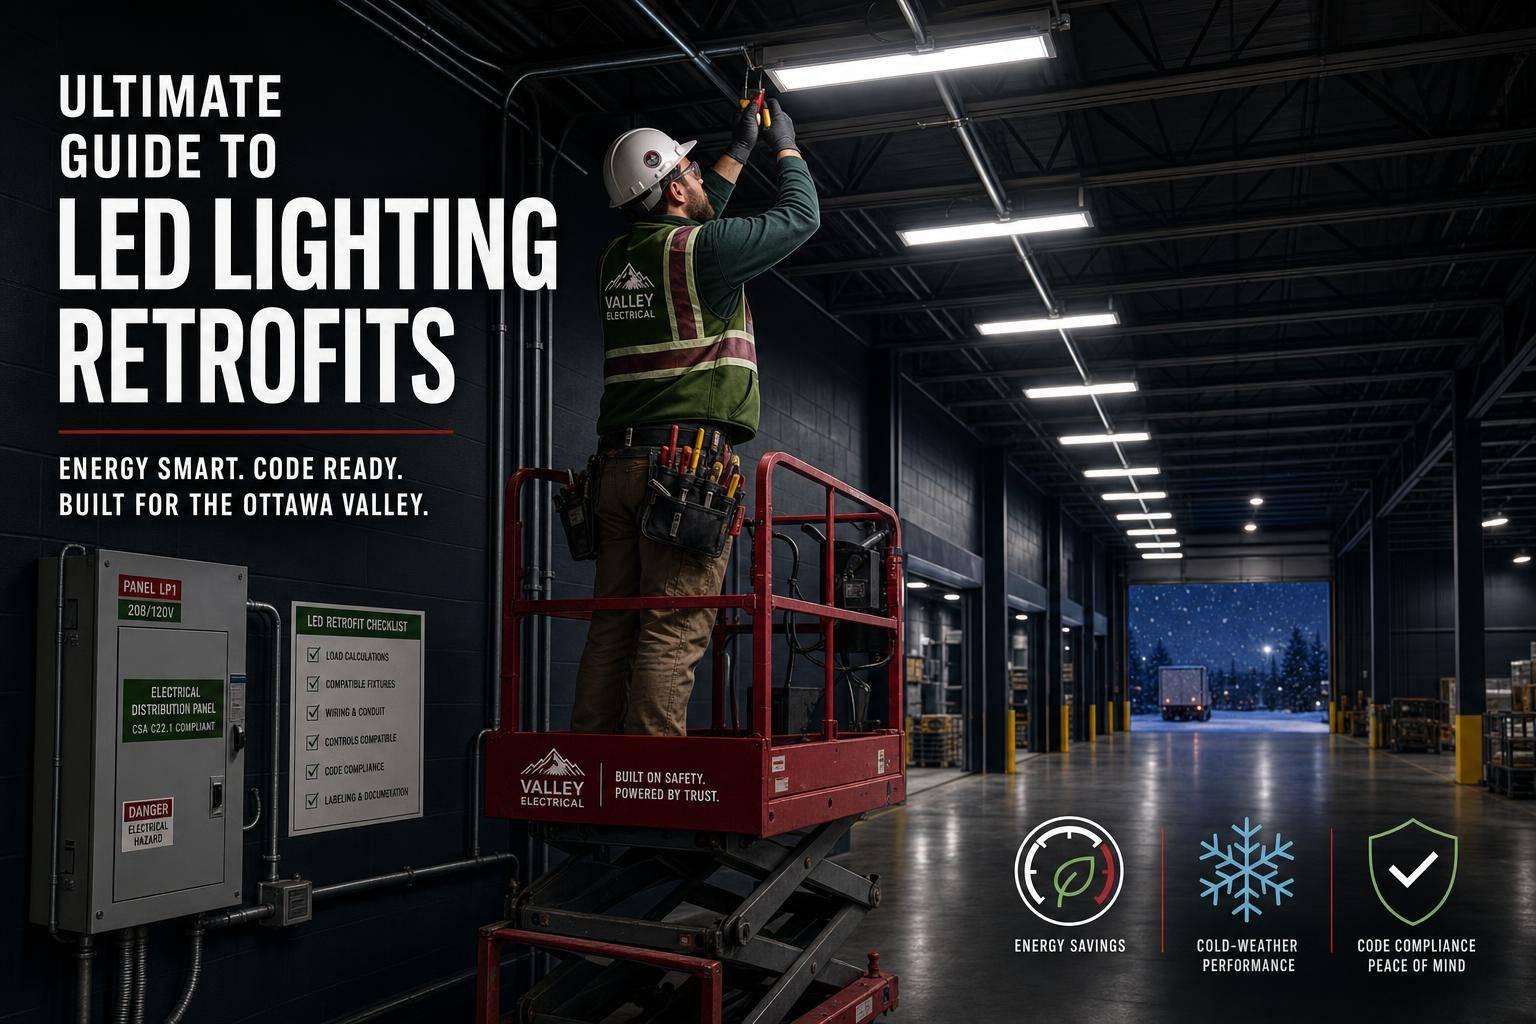
If your lights still work, you may not need all-new fixtures to cut power use by 50% to 75%. In many cases, I’d look at the fixture condition, ballast setup, controls, and daily run time first. That tells me whether a simple LED lamp swap, a ballast-bypass retrofit, or a full fixture change makes the most sense.
Here’s the short version:
Before I’d buy anything, I’d check:
A simple way to think about it is this: lamp swaps cost less up front, retrofit kits remove ballast trouble, and full fixture replacements are often the better pick for worn-out or outdoor fixtures. If I’m dealing with rewiring or a retrofit kit, I’d make sure the product is properly listed and labelled, and I’d bring in a licensed electrician.
Use this guide if you want to figure out whether an LED retrofit is worth it, which option fits your space, and what to watch for after installation so the savings show up on your bills.
A retrofit makes sense when the savings, lower upkeep, and lighting gains are big enough to cover the cost of the change. If a fixture still has life left in it, the main question becomes simple: does the payoff make the upgrade worth it?
LED retrofits usually pay back in three clear ways: lower energy use, fewer maintenance headaches, and better light.
LEDs produce more light per watt than fluorescent or metal halide lamps. That’s why most retrofits reduce energy use by 50–75%.
The maintenance side can be an even bigger deal than people expect. Older fixtures often need regular ballast replacements, and one ballast change can cost $150–$300 per fixture once labour and lift rental are included for hard-to-reach spots. That adds up fast.
LEDs usually last 50,000 to 100,000 hours, which can reduce maintenance costs by 70–80%. In places like warehouses and parking garages, or anywhere access is a pain, that drop in upkeep can matter just as much as the hydro savings. Sometimes more.
Cost is one part of the story. The other part is what the light feels like and how well the space works every day.
LEDs can also make a space easier to use. They offer low-flicker performance and usually deliver a CRI of 80–90+, which is better than many older fluorescent fixtures. Better colour rendering means colours look more true to life. That matters in retail displays, workshops, and task areas where clear visibility helps cut mistakes and eye strain.
In Canadian conditions, LEDs also handle cold weather well. They start instantly in temperatures as low as -40°C. Fluorescent lights, by contrast, can dim and flicker in the cold. That can be a problem in unheated garages, storage areas, and parking structures during Canadian winters. LEDs don’t need warm-up time and keep full output in low temperatures.
Lower operating costs and better light can also affect how a property is used, leased, and maintained.
Once those gains are on the table, the next step is to check whether the existing fixtures, controls, and run times are a good fit for a retrofit.
Before you buy fixtures or book an installer, take a close look at what’s already in place. A bad retrofit can burn through cash and leave you with bigger headaches later. The best approach is simple: check the fixture first, then the controls, then how long the lights run each day.
Start by identifying each fixture type in the space – fluorescent troffers, high bays, downlights, or floodlights. Record the fixture model, lamp type, wattage, and base. If possible, take photos of the fixture labels and internal parts, especially the ballast. That part matters because the ballast type tells you whether a Type A tube will work or whether the ballast needs to be bypassed.
Controls matter just as much as the fixture. Older dimmers can lead to flicker, buzz, or uneven dimming with LEDs. Some older sensors and timers also need a minimum load to work properly. Since LEDs use so little power, a single fixture can drop below that limit, which may cause the lights to flicker or not switch off the way they should. Make a list of every dimmer, sensor, timer, and emergency circuit before you pick a product.
Run time is the third piece. Spaces with heavy daily use usually make a deeper retrofit easier to justify than spaces used only now and then. Areas that run 24/7 pay back retrofit costs faster than storage rooms used for only a few hours each week.
Once you know what hardware you have, match the retrofit to how the space is actually used. Colour temperature, light output, and protection rating should fit the job and the conditions.
Those details help narrow your retrofit options before installation and code review.
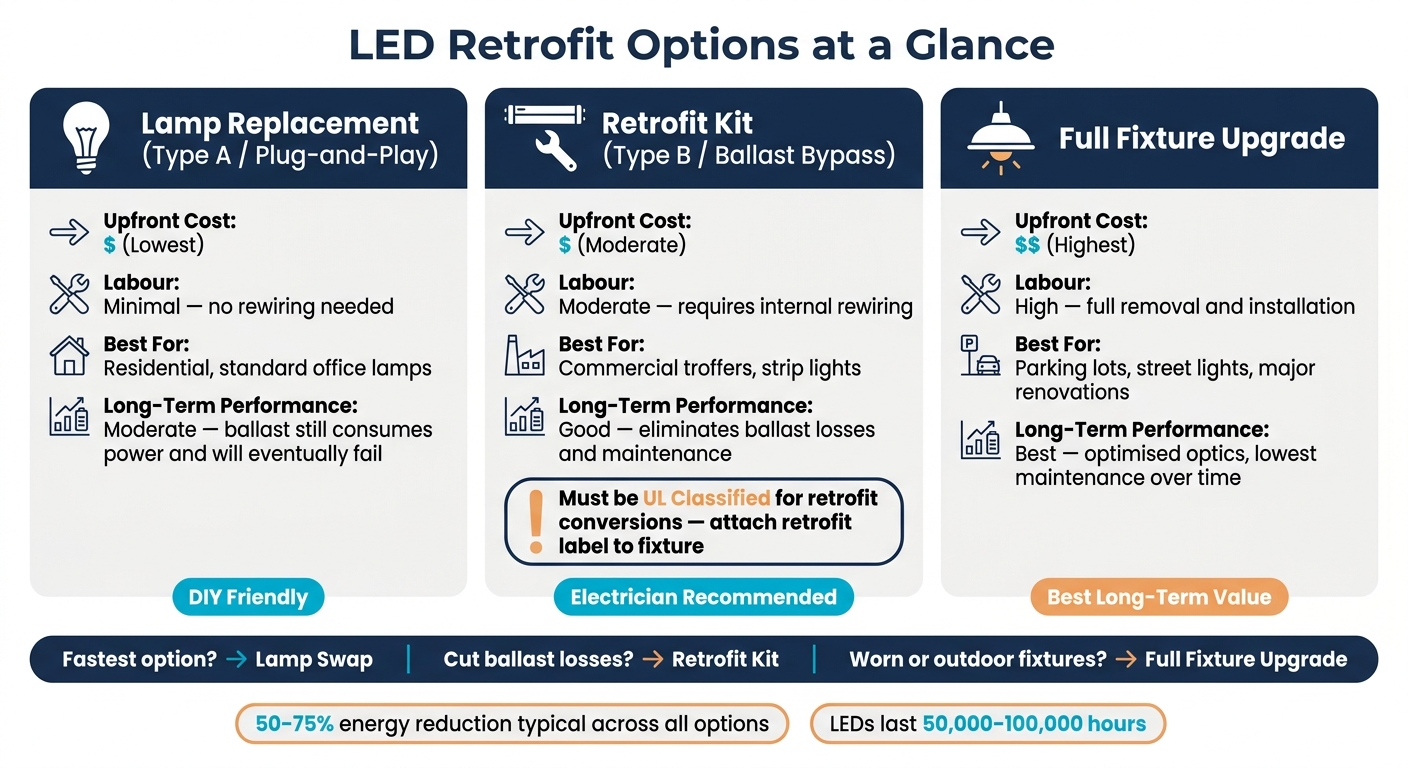
LED Retrofit Options Compared: Lamp Swap vs Retrofit Kit vs Full Fixture
Once you know what fixtures you have and how the space is used, the next move is choosing the right retrofit route. There are three main paths, and the right one comes down to budget, fixture condition, and how much output and lifespan you want.
| Approach | Typical Use Case | Upfront Cost | Labour | Long-Term Performance |
|---|---|---|---|---|
| Lamp Replacement (Type A, plug-and-play) | Residential, standard office lamps | Lowest | Minimal | Moderate – ballast still consumes power and will eventually fail |
| Retrofit Kit (Type B, ballast bypass) | Commercial troffers, strip lights | Moderate | Moderate – requires internal rewiring | Good – eliminates ballast losses and maintenance |
| Full Fixture Upgrade | Parking lots, street lights, major renovations | Highest | High – full removal and install | Best – optimised optics and lowest maintenance over time |
Here’s the short version: lamp swaps are the fastest option, retrofit kits cut out ballast losses, and full fixture upgrades make the most sense for worn fixtures or outdoor lighting.
One detail matters a lot with retrofit kits. If you modify a fixture, you can void its original UL listing. That’s why the kit should be UL Classified for retrofit conversions, and the retrofit label from the kit maker needs to be attached to the fixture. That label shows future maintenance staff and inspectors what was changed.
Before you order parts, double-check the wiring method, product listing, and any controls you plan to use.
Shut off power at the breaker panel, not just the wall switch. After you’ve confirmed the circuit is dead, you can remove the old lamp or ballast and install the new parts.
Simple lamp swaps are often fine for DIY work. But Type B ballast-bypass wiring, commercial retrofits, exterior fixtures, or any job that involves your electrical panel should go to a licensed electrician. The same goes for projects that include dimmer updates, occupancy sensors, or fixture replacements during a larger renovation. In those cases, the wiring and panel may need a look before any work starts. Draper Electric provides residential and commercial electrical services across the Ottawa Valley, including panel upgrades and exterior wiring.
At that point, the focus shifts from picking products to making sure the wiring and labelling meet code.
Use CSA-approved products and follow local inspection rules before turning the system back on.
Once the retrofit hardware is picked, plan the controls and emergency circuits at the same time.
LEDs work well with occupancy sensors because they turn on right away and handle frequent switching without trouble.
For exterior fixtures in Eastern Ontario, choose products rated for temperature swings down to −40°C. For emergency lighting and exit signs, check the installation method with your local Authority Having Jurisdiction (AHJ). Some municipalities require an inspection after luminaire retrofit kits are installed.
Once the retrofit is live, compare results against your pre-upgrade baseline. The first few months matter most, so keep a close eye on performance. Pull up your electricity bills and line them up against the same period from before the retrofit. If the job was done well, you should see a clear drop in lighting energy use. If the savings look weak, start with the controls. False triggers or sensors that stay on too long can eat into the savings fast.
Pay attention to day-to-day light quality too. Flicker, uneven dimming, or colour shift often point to a driver or dimmer mismatch. For exterior fixtures, do a separate check. If you spot fogging or moisture inside the lens, the seal may have failed, and that can shorten fixture life. In kitchens and industrial areas, make sure the fixture’s IP rating fits the space.
A simple maintenance routine goes a long way. Clean lenses and diffusers every quarter. Dust and grease cut light output more than most people think. Once a year, have a licensed electrician inspect grounding, surge protection, drivers, and emergency lighting.
| Maintenance Task | Frequency | What to Check |
|---|---|---|
| Visual Inspection | Monthly | Flickering, dark fixtures, colour shift, blocked sensors, cracked lenses |
| Cleaning | Quarterly | Dust, grease, or grime on diffusers and covers |
| Outdoor Seal Check | Semi-annually | Gasket condition, moisture inside the lens, insect intrusion |
| Electrical Review | Annually | Driver performance, surge protection status, dimming/control compatibility |
A retrofit only pays off if it keeps doing its job after installation. That means matching the upgrade to the fixture’s condition, how the space is used, and the code rules that apply. In some cases, lamp replacements make sense. In others, retrofit kits or full fixture upgrades are the better fit.
Use a licensed electrician for wiring, controls, and panel work. Then keep tracking bills and maintenance so the savings don’t slip away over time.
A ballast-bypass retrofit (Type B) makes sense if you want to get rid of ballast-related problems and improve long-term efficiency. It takes a bit more work to install, but once the ballast is gone, you also remove a part that draws power and can fail.
For most office projects, a Type B retrofit or full fixture replacement tends to deliver the best long-term value, with lower maintenance needs and better energy efficiency.
Not always. It depends on the product.
Some LED retrofit lighting is dimmable, but it may need a matching dimmer or sensor to work as expected. Other products don’t support certain control types at all.
Replace the whole fixture if the current one is in poor shape, such as a damaged, cracked, discoloured, or rusted housing, or broken or worn-out lenses.
This can also make more sense if the ballast is over five years old, changing lamps is a hassle, or you want the highest efficiency, a longer service life, and smooth control integration.