![]()
Electrical Products & Services
Regular electrical inspections can prevent fires and protect your home. Follow this essential checklist to ensure safety for your family.

Electrical issues cause thousands of house fires every year, with faulty wiring responsible for 69% of these incidents. Regular inspections can prevent accidents, protect your family, and keep your home safe. Here’s a quick breakdown of the 10 key safety checks every homeowner should perform:
Electrical fires result in 31,000 incidents annually in the U.S., causing severe damage and loss of life. Following this checklist and scheduling regular professional inspections can save lives and prevent costly repairs.
Start with a quick GFCI outlet test today to ensure your home’s safety.
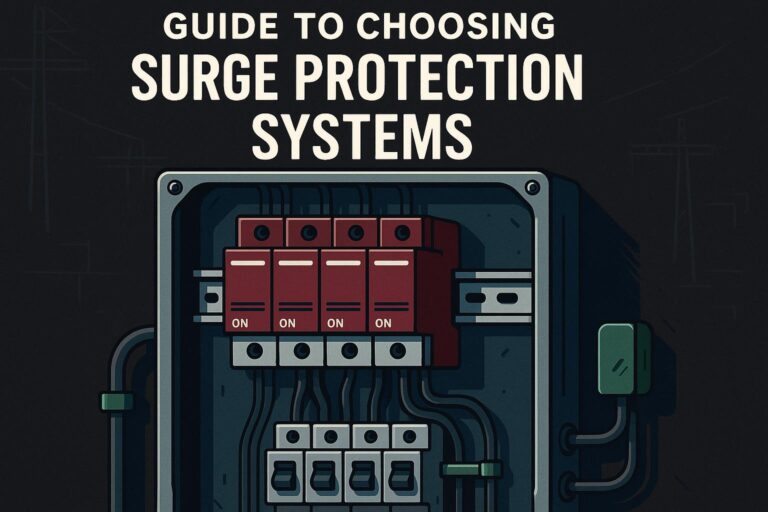
Your electrical panel acts as the control center for your home’s electrical system. Regular inspections can help ensure it stays safe and functional. Here’s how to check for overheating, corrosion, and proper labeling.
A healthy electrical panel should feel cool or slightly warm to the touch. If it feels hot, that’s a red flag.
Watch for these signs of overheating: flickering lights, buzzing noises, burning smells, or scorch marks.
"It is essential to detect and correct any failing connections before they create a fire hazard and impending shutdowns that can be crucial to manufacturing, commercial, and institutional activities, and their operations." – NOYAFA (HK) TECHNOLOGY CO., LIMITED
Tools like the NOYAFA NF-522 thermal imaging camera can help identify temperature changes, ranging from -40°F to 626°F. Its color-coded display highlights potential problem areas before they escalate.
Corrosion can compromise your panel’s safety. Look for:
Pay close attention to circuit breaker connections, bus bars, wire terminals, and seams. If you notice any corrosion, avoid attempting repairs yourself – contact a licensed electrician. Corroded components can fail during emergencies, leading to serious risks.
Accurate circuit labeling is key for safety and efficiency. It can cut troubleshooting time in half and prove invaluable during emergencies. Here’s how to create a reliable circuit directory:
Electrical Contractor Magazine notes that proper labeling can reduce project times by 30%. Keeping your directory up to date ensures quicker responses in emergencies and helps avoid accidental disruptions to critical equipment.
After inspecting your electrical panel, it’s important to ensure GFCI outlets are working properly. These outlets are designed to detect electrical imbalances as small as 4–5 milliamps and immediately shut off power to prevent shocks.
The National Electrical Code (NEC) mandates GFCI outlets in areas of your home where the risk of electrical shock is higher. Here’s where to look:
"GFCI outlets in the kitchen reduce the risk of shock while cooking, washing dishes, or other tasks, and GFCI outlets in bathrooms provide similar electrical protection." – Express Electrical Services
Even if your GFCI outlet has a self-test feature, it’s still a good idea to test it manually every month. Here’s how:
If the outlet doesn’t work as expected, it’s time to call an electrician.
"Like any device, GFCIs will wear out over time or fail without showing obvious signs. This is why you should test them, especially in older homes or in areas where moisture is more frequent. If you find a bad one, this is not something you should ignore because a malfunctioning GFCI cannot protect you from electrical shocks." – Daniel Vasilevski, Director, Bright Force Electrical
Signs Your GFCI May Be Faulty:
GFCI outlets generally last 10–15 years. If yours are nearing this age or showing any of the warning signs above, it’s time to replace them to ensure your safety. Next, move on to inspecting power cords for any damage or overloading issues.
After reviewing your electrical panel and GFCI safety, it’s time to inspect power cords to wrap up your home’s electrical safety check. Faulty or damaged wiring plays a big role in electrical fires – accounting for 69% of cases, according to the National Fire Protection Association. Start by checking cords for any visible damage.
Look for these signs of damage:
"Multiple plug outlets must be plugged directly into mounted electrical receptacles; they cannot be chained together." – National Electrical Code (NEC)
Use the table below to ensure cords can handle the appliances they’re powering:
| Wire Gauge | Maximum Amperage | Maximum Wattage | Typical Uses |
|---|---|---|---|
| 18-gauge | 5 amps | 600 watts | Lamps, small electronics |
| 16-gauge | 7 amps | 840 watts | Power tools, computers |
| 14-gauge | 12 amps | 1,440 watts | Kitchen appliances |
| 12-gauge | 16 amps | 1,920 watts | Heavy-duty equipment |
To figure out an appliance’s power needs, multiply its amperage rating (found on its label) by 120 volts. For instance, a 10-amp appliance requires 1,200 watts (10 × 120 = 1,200). Once you’ve confirmed the cord’s rating, ensure you’re not overloading any outlets.
A typical 15-amp circuit in U.S. homes supports up to 1,800 watts, but for continuous use, it’s safer to stay at 80% of capacity – or 1,440 watts. Here’s how to avoid overloading:
"Remember that power strips only add outlets – they do not change the amount of power the outlet receives." – Electrical Safety Foundation International
If you’re relying on extension cords frequently, it’s a sign you need more outlets. The National Electrical Code reports that 3,300 home fires start from extension cords each year, causing 50 deaths and 270 injuries. Consider having an electrician install additional outlets to reduce risks.
Once you’ve inspected power cords, it’s time to examine your home’s wiring for outdated systems. Old wiring can be a serious hazard. According to the Consumer Product Safety Commission (CPSC):
"Homes wired with aluminum wire manufactured before 1972 are 55 times more likely to have one or more connections reach ‘Fire Hazard Conditions’ than is a home wired with copper." – Consumer Product Safety Commission
Some wiring types are more prone to issues and may require immediate attention:
| Wiring Type | Installation Period | Key Identifiers | Risk Level |
|---|---|---|---|
| Aluminum | 1965-1973 | Silver-colored, marked "AL/ALUM" | High |
| Knob-and-Tube | 1900s-1940s | Ceramic knobs; tubes in attics/basements | Severe |
Spotting these early can help prevent serious problems.
Keep an eye out for these warning signs:
If you notice any of these issues, don’t wait – schedule a professional wiring inspection. Homes older than 25 years or those with buzzing sounds, shocks, frequent breaker trips, or burning smells should be reviewed by a licensed electrician.
Faulty aluminum wiring has been linked to tragic incidents, emphasizing the importance of regular inspections. When hiring an inspector, make sure they are licensed and have experience with older wiring systems. They should thoroughly check:
After addressing your wiring, move on to reviewing your home’s detection systems to ensure overall safety.
Ensuring your safety detectors are working properly is a key part of a thorough electrical safety checklist. According to the National Fire Protection Association (NFPA), homes with functioning smoke alarms cut the risk of fire-related deaths in half. Start by checking the power source – make sure the batteries in your detectors are in good condition.
Safety detectors typically rely on one of three power sources. Here’s what you need to know about maintaining them:
| Power Type | Battery Schedule | Key Maintenance Notes |
|---|---|---|
| 9-volt Battery | Replace every 6 months | Swap batteries during Daylight Saving Time changes. |
| Hardwired with Backup | Replace backup every 6 months | Test monthly, even if connected to main power. |
| 10-year Lithium | No replacement needed | Still requires monthly testing. |
To keep things simple, align battery replacements with Daylight Saving Time changes.
The NFPA highlights a critical fact: nearly 60% of home fire deaths happen in homes without working smoke alarms. Their advice?
"Test all smoke alarms at least once a month. Press the test button to be sure the alarm is working."
Here’s how to test effectively:
Even with regular maintenance, detectors don’t last forever. Kidde, a leading manufacturer, warns:
"Carbon monoxide alarms do not detect the presence of carbon monoxide when in end-of-life mode, which is why it’s important to take precautionary steps when you realize your CO detector is nearing time to be replaced."
Stick to these replacement timelines:
Replace detectors immediately if you notice constant chirping, yellowed casings, failed tests, or if the manufacturing date shows they’re past their lifespan. You can find the manufacturing date printed on the back of each unit. If it’s missing or the detector is nearing its end of life, don’t wait – replace it right away.
Each year, about 170 people die from carbon monoxide poisoning caused by non-automotive sources. Keeping your detectors in working order is a simple step that can help prevent tragedy.
After inspecting panels, GFCIs, cords, and wiring, it’s important to stay alert for certain warning signs. Electrical issues cause thousands of house fires every year, so recognizing these signs can help you take action before problems escalate.
Flickering lights can point to serious electrical problems.
"When lights begin to flicker regularly, it is a telltale sign of an underlying issue with the electrical system. The problem can be severe enough to jeopardize the safety of the home and family."
Here are some common causes of flickering lights and what you can do:
| Condition | Likely Cause | Action |
|---|---|---|
| Single light flickers | Loose bulb or fixture | Tighten or replace |
| Multiple lights flicker during appliance use | Circuit overload | Check circuit capacity (115-125V) |
| Whole house flickers | Utility or main panel issue | Contact your power company |
| Fixture switch wobbles | Faulty switch wiring | Call a licensed electrician |
A properly functioning electrical system should be silent. Strange noises often mean trouble.
"An undisturbed wiring system will more or less work forever, but when it’s disturbed or altered, there’s potential for trouble."
If you hear buzzing, crackling, or other unusual sounds:
Outlets should stay cool, even when powering devices that generate heat.
"Even when an appliance is meant to produce heat (like a toaster or space heater), the outlet that powers it should never become hot."
To test, touch the outlet faceplate. If it feels hot:
Be especially cautious if you notice burning smells or a fishy odor – these are signs of a potentially dangerous electrical issue that needs immediate professional attention. Addressing these problems quickly can help maintain the safety of your home.
Once you’ve confirmed your detectors are working, it’s time to take the next step: a professional inspection. While your DIY checks are helpful, a professional evaluation provides an extra layer of protection. In 2021, electrical malfunctions were responsible for 24,200 home fires – a clear reminder of why expert assessments are so critical.
Professional electricians have the tools and expertise to uncover hidden risks that might escape the untrained eye. They can spot potential issues early, reducing the chances of dangerous situations.
| Inspection Area | What Experts Do | Why It Matters |
|---|---|---|
| Hidden Wiring | Use thermal imaging to find hot spots | Helps prevent fires caused by deteriorating wires |
| Load Analysis | Conduct advanced equipment tests | Avoids circuit overloads |
| Code Compliance | Ensure your system meets current regulations | Keeps your home up to safety standards |
| System Integration | Assess entire electrical systems | Detects compatibility problems across devices |
Licensed electricians go beyond basic checks. Randy Draper of Draper Electric puts it best:
"Electrical inspections are an investment in the safety and efficiency of your home. Regular checks every 3-5 years can identify issues, saving you time and money in the long run."
Here’s a simple guide to help you decide how frequently to schedule inspections:
| Home Age | Recommended Frequency | Key Focus Areas |
|---|---|---|
| Under 25 years | Every 3-5 years | Check after adding major appliances |
| 25-40 years | Every 2-3 years | Pay attention to wiring wear and tear |
| Over 40 years | Annually | Include a detailed circuit load review |
You should also consider an immediate inspection in these cases:
Faulty wiring is a serious issue, causing nearly 500 deaths annually from electrical fires. Regular inspections are a small cost compared to the potential dangers and expensive emergency repairs they can help prevent. For older homes in particular, yearly evaluations can catch aging components before they fail, keeping your home safe and your wallet intact.
Make professional inspections a regular part of your home maintenance plan.
Now that you’re familiar with your electrical safety checklist, it’s time to set up a maintenance schedule. Use the table below to plan your routine and keep track of safety tasks.
| Time Period | Safety Tasks | Priority |
|---|---|---|
| Monthly | Test GFCI/AFCI outlets; check detectors | Critical |
| Quarterly | Inspect outlets and cords visually | High |
| Semi-annually | Check the electrical panel’s temperature | Important |
| Every 3–5 Years | Arrange a professional inspection | Essential |
Matt Koch, Director of Electrical at Five Star Home Services, highlights the importance of regular checks:
"Electrical safety is a priority, so regular electrical inspections should be done as part of that goal. Electrical safety inspections should be done every three to five years for residential homeowners."
Here’s how to get started:
Incorporate these steps into your routine to stay on top of safety checks. Store all maintenance records in one place, noting inspection dates, repairs, and any issues.
Also, don’t forget to check smoke detectors, replace batteries as needed, and document all updates. Regular testing and professional reviews will help ensure your home stays safe.